Showing posts with label pallets. Show all posts

Sunday, November 10, 2013

Building a pallet back yard swing

It's summer time and since our nearest park is about 15 miles away, I am bringing the park to our house. I bought two pieces of rope from the hardware. I slipped it through some tubing we had but you can also buy tubing at the hardware store. I put it in a secured location and placed a slip knot to secure the ends to the tree. 

I had two pieces of pallet that were pretty sturdy. 

I used another pallet and cut it into several pieces.

Those pieces I then screwed into the two sturdy boards. 

Upon flipping over the wood, I discovered a scorpion. Yikes. I never have seen a scorpion before in my life so it was pretty freaky since I didn't know how poisonous they were. I ended up talking to a local and they said they hurt like sin but won't kill ya. Good to know. 

I then set it up just to see if it would work. The rope is a bit far but I wanted it large enough for two people to sit on it, aka, my kids together or two...

Saturday, April 27, 2013

Jewelry Organization


During the move I had just thrown all my jewelry into a basket and that is where it remained, tangling up and collecting dust. After the third time knocking it over, I decided that I needed a better solution to my jewelry. 
I have had these frames since the move, begging me to use them. I decided to go with the one on the left and create a place for jewelry to be displayed and to also keep tangled free. 
I measured and cut using my trusty Miter Saw. 

I placed them in where I wanted them and when I was satisfied at the end result I flipped the frame over and took out all the boards. I used the bottom board in this picture to raise the top board closer to the back of the frame, so it would be inset a little for my jewelry to hang. Using nails, I hammered in two nails on each side of the board, careful not to go through the front. 
For my last board, since it was the only board I had left, I used scrap pieces that were left in my cutting to prop up the final board to nail into place. 
This is the last board that I nailed, I got better at the angle as time when on. 
My little helper was extremely busy. 
On the back of these frame was already a U hook so I tied a wire to it and twisted it around. 
I cut the wire and looped the end through the other U hook to create a wire hang on the back. Then I flipped it over. 
Not bad if I do say so myself. :) Like my paint jeans? 

I hammered in regular silver nails (small ones) and hung some jewelry up. I obviously didn't fill this up for display purposes only but you could triple the amount of nails and hang anything your little heart desires! 
There was a purpose for leaving the gap in between the boards, to hang my rings of course!


Saturday, April 20, 2013

Displaying Halters in your Home

If you have some collected halters (for those of you that are into horses or western decor) I want to show you a new way of displaying them. We have several pieces that are super special to my cowboy. For those sentimental pieces I wanted to have an organized place for each of them.

I started by going to Lowes and purchasing these door knobs. They match my kitchen's nobs. I found my favorite thing in the world (a piece of pallet wood from an old pallet). 

I start by placing the screw in the wood where I wanted the knobs to go in the back of the wood. 

When I flip it over, you can see the screw is through the wood. I then just have to screw on the knob. Pretty easy, eh? 

This is what it looks like with the knob in place. 

This is my daughter, counting in spanish, the number of knobs. :) Then she did it in english. (We love Dora the Explorer)

I use my favorite wood finish, Minwax in Golden Oak and after taking the knobs off again, I stain the wood. This time I just used an old rag to apply the stain. 

I then used a stud finder to locate the studs in my wall. Halters can weigh a lot and I do not want anyone getting knocked out by it falling. I placed it beside the knob so that when the halters are in place, the screws are hidden. 

The final result is a display of our halters besides my cowboy's coors guy. Happy hanging. 

Sunday, April 7, 2013

Pallet bookshelf

Oh goodness I am at it again with more pallets. I mean how can you not love free wood?
I first use my trusty Milwakee saw and I cut apart the pallets, cutting along the nails.


Once apart, I place them together. I want a deep setting shelf that can carry my stereo as well as hold some of my baskets. 


I screw along the horizontal pieces into each board. 

Once I have the sides put together I set them up, facing each other. 

I place the boards together with screws. My daughter stole my camera so I missed about five steps but you can see that I screwed in the horizontal boards on the front first and then the cross pieces in the back. You can see from the picture below I then added more boards in the inside and screwed them to the cross pieces. 

I then placed all the boards on the ledge that I created and added boards on the top, middle and bottom and screwed them down. 


Once again, when putting the two sides together, I secured these boards first to connect the two pieces and then added the cross pieces in the back before adding all of the shelves.

This is the inside view of the back 'wall of the shelf. The pieces are by no means perfect but they covered the diagonal piece in back. 

Here is another view of the bottom corner.

Then we added our favorite Minwax stain in Golden Oak.


My favorite little girl helper assists with the stain.
End result. :) 


Thursday, January 31, 2013

Pallet Sandbox

This project took about thirty minutes and will last my children hours of fun! Not to mention they will be able to play outside! I am in the process of creating six raised beds in my newly established garden. She was constantly trying to jump in and dig. I knew this would be a problem when my little seeds would be poking their little heads out of the ground. I decided to make a sand box right next to the raised garden beds so that she would have a place where she could dig till her heart is content. 

I took a regular pallet and gutted it. This is the guts. 
I used my milwalkee sawmill reciprocating saw and cut the nails free and the middle brace out. 


What I did was keep the frame of the pallet. I also opted to keep the top and bottom ends to create a 'bench' for the kids. That way if it rains their butts won't end up orange from the Oklahoma red dirt. :) 


Old trusty...My black and decker sander.

 I sanded the boards to make sure that I could run my bare hand along the wood without splinters. Sand first people before you run your hand along the wood! If the kids wear shorts in the summer they will not be hurt by a splinter from the old pallet wood.

I placed the sand box in the spot i wanted to use and then dug out the inside about 6 inches. I used the black tarp and lined the bottom so that the sand box won't fill up with weeds right away. 


I then filled the tarp with sand from our local pond. Free. Cost only sand paper and a little electricity for the sander and sawmill. 

My little model is demonstrating how awesome the little seat is working out. My 11 year old loves the sand box. Which means if you build it, they will come and leave your garden alone! 


Friday, January 11, 2013

Creating a desk using reclaimed wood

Good morning from Oklahoma! This is my reclaimed wood desk project. The final desk measures three feet by 8 feet long. It is 31 inches from the bottom to the top. Pretty big because I will be making a hutch in the coming weeks to sit on top of this.
This was my reclaimed wood. I found it on our property when we moved in. It was warped and faded even though it was stored in a shed. There was signs of water damage. It was perfect. Free! 

I started by lining up the boards, some of the boards magically fit together, others did not. It was a little puzzle that my son and I tacked together, trying to find the closest "fit" for the top of the table. 

We settled in on this fitting and laid a long board in between our doorway to get a 'level'. Yes I am not a carpenter but I do use normal 'common' sense leveling practices. My husband even asked when I was done...did you use a level. No. But the thing is 'level' so thats what counts right? :) 

I placed boards on top 'measuring them out' and then started screwing them down, one by one.

Note to self: Don't leave screws out for toddlers to scatter throughout the house. I am still finding missing screws.

The result was the top of the 'desk'. 

I put on legs, securing them with screws and 'wedging' them in with boards so they would not wobble. 
Honestly just look up tables and get an 'idea' of how legs should be secured and then go for it. If it feels unsafe, then add some cross beams in and screw more. Yes...common sense. If you think it is wrong, well chances are you need more support and screws. 


This shows a front view of the desk. 

I sanded everything down. The top I took my time and probably spent two hours sanding the top. I sanded all prints and stamps off of the wood. Sand well, you do not want splinters in your hand while writing checks. It will make bill paying a lot less enjoyable.


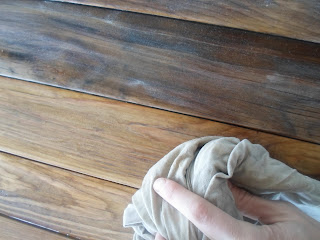
I wiped the entire desk down with a rag.

I used my favorite Golden Oak from Minwax.


I applied, going with the grain, each board, one by one until the entire desk was covered, then worked on the legs. I let the stain dry for 24 hours.

I then applied one coat of polyurethane. I let it dry for 24 hours. 
I sanded the polyurethane with a fine sand paper. 

I then wiped it off with a rag and put a second coat of polyurethane on and let it dry for an additional 24 hours. The result was a smooth surface. 

The end result is a large desk...the hutch is next. 


This shows my cross beam in the back.


Happy creating! Btw..you never really need plans. You just need to go for it. Yes this isn't a perfection website but a get off your ass and do it website. Happy creating!