Friday, February 1, 2013

Branding in 2011

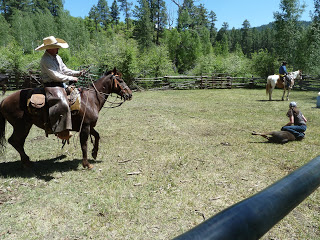
In 2011 we took these pictures of our branding. Each year we gather our cattle and sort off the calves from their mothers (sometimes we keep them together) and we rope, brand, vaccinate, dehorn, and castrate (remove the balls). Phew such a lot for such a little cow but they handle it well.

My husband taking a rest amongst the aspen trees as we moved cattle several weeks before the branding.

A bunch of our friends watching riders rope calves.

Here is our friend, Twine, with a calf roped and I am holding it down for the brand.

And I am still holding. :) 


My husband is to the right of me. 

Our mother cows.

My cowboy's parents restored a chuckwagon and cooked us a very tasty meal for everyone who came. Even people we didn't even know. :) 

My little girl pausing for a bottle and giving momma a break from the cows.

Repaint a store bought sign

My little toddler loves horses. Her room is brown and purple. I decided to get this for her and since it didn't match her room, I repainted the sign. I used sample colors from her burlap sign project and while my son did homework, I painted away. The sign was black with a red heart.

I applied the first coat and then a second coat since we were painting over such a dark sign. I then repainted the heart in a different shade of purple. I opted to keep the little horses underneath so I just painted around them. 
I put it under an old chandelier that I had when I was in college. I hung it the same day so I have yet to hide the chord. On my to do list. (It keeps getting larger!)

Happy repainting!


No sew curtains and natural wooden rod

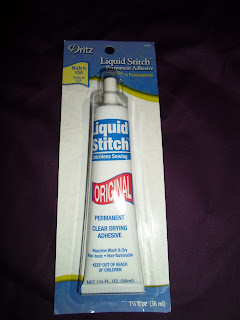
For my no-sew curtains, I bought two- three yards of fabric. It was less expensive to buy them from walmart by doing two-three yards of fabric rather than one six yard of fabric. I knew I would be using the fabric to make two panels so it wasn't painful to have it broken up. I used liquid stitch on the fabric.
I placed the fabric on a huge working surface, in this case, my floor. 


I placed a paper towel under where I would be making the fold with glue. I drizzled a small portion in a straight line where I wanted to make the crease. I then used a q-tip to make an even swipe down the line to even out the glue. Work quickly because the glue dries fast. I folded and bonded the sides of the panels first.

Once the sides were done I worked on the top. I folded and glued a small flap over to secure the ends similar to the sides.

Next I folded over the top. I made a seven inch fold from top to end of fold. This picture shows the glue  on the inside of the fold, which I smoothed out with a q-tip. 

I then made sure the fold was secure and pressed down. This picture shows the top, completed on the side. We have plenty of room to find a branch to fit through. 

I measured my window sill from the bottom of where I would be hanging the wooden rod and the bottom of the floor, which measured 87 inches. I cut at 89 inches to allow a two inch fold at the bottom. I then glued and secured the bottom at 87 inches, the desired length.

I ironed both panels going all the way to the edge. 

We have many branches like this around our property. We use them for stays in our fence. ((For all you ranchers I will be posting 'how to' on 'ranch stuff' in the future.)

I used my handy black and decker battery saw (since my husband thinks I will cut my leg off with a real one) and chopped off the top. I was going to keep the top but...it didn't fit in her room. 

I put the panels on the rod and screwed the rod into a stud. (use a stud finder, do not guess)
Lucile playing with the old 'rod' in her room.

The result are two panels. I will be making burlap tie backs in the future. 


Thursday, January 31, 2013

Redoing peeling paint

When we moved into our home (Dec 2012) there was one room. The previous owners had put plaster on the walls to provide texture and then they painted it red and black. The problem was they must have painted over wet plaster because the paint underneath was peeling. And it wasn't an easy peel. 
These are the before pictures. It had to go, sorry Sooner fans.


I started the painful process of sanding. It took forever. As much as I love to sand, it just wasn't getting the job done so I changed to a small scraper (the bigger metal scrapers didn't work). Literally, I spent 40 hours painfully scraping all of the plaster and the red, black, and purple (there were more colors underneath!) out of the room. I uncovered graffiti from a small artist and where they had once had a roof leak (on my to-do-list).

Look at all the peelings on the floor! See the purple!?


Then the next part was to use a Kilz primer and prime the entire room thanks to an awesome contest I won from Kilz I was able to transform my room back to 'white'. I was able to eliminate all of the artists 'tags' and start back to a fresh start.


Kilz did a great job of covering up everything else that I left behind! Please visit their Facebook Page!
Like them and buy their product.... it really does hide SO MUCH! Especially black and red paint...

I then taped the room to get it ready for paint with primer. I want to show how I tape corners. I think it must be the OCD in me that allows this kind of behavior to not only happen but to blog about taping corners! LOL...
I start with the top and curl around the edge, making sure it is exactly in position.

I fold in the top part and putting a crease in the tape, sort of like if you were folding a package for a present. 

I then wrap the other side over, which forms a perfect taped corner.

I then taped everything that I wanted to stay white. 

Then I applied the dark color and let dry 24 hours.


The result is a guest room which might appear dark color but after I accent with brown and yellow, will cheer it up a bit.


Pallet Sandbox

This project took about thirty minutes and will last my children hours of fun! Not to mention they will be able to play outside! I am in the process of creating six raised beds in my newly established garden. She was constantly trying to jump in and dig. I knew this would be a problem when my little seeds would be poking their little heads out of the ground. I decided to make a sand box right next to the raised garden beds so that she would have a place where she could dig till her heart is content. 

I took a regular pallet and gutted it. This is the guts. 
I used my milwalkee sawmill reciprocating saw and cut the nails free and the middle brace out. 


What I did was keep the frame of the pallet. I also opted to keep the top and bottom ends to create a 'bench' for the kids. That way if it rains their butts won't end up orange from the Oklahoma red dirt. :) 


Old trusty...My black and decker sander.

 I sanded the boards to make sure that I could run my bare hand along the wood without splinters. Sand first people before you run your hand along the wood! If the kids wear shorts in the summer they will not be hurt by a splinter from the old pallet wood.

I placed the sand box in the spot i wanted to use and then dug out the inside about 6 inches. I used the black tarp and lined the bottom so that the sand box won't fill up with weeds right away. 


I then filled the tarp with sand from our local pond. Free. Cost only sand paper and a little electricity for the sander and sawmill. 

My little model is demonstrating how awesome the little seat is working out. My 11 year old loves the sand box. Which means if you build it, they will come and leave your garden alone! 


Thursday, January 24, 2013

Making perfect garden rows indoors

My organized seed 'catalogue'. :) I separate it out by vegetable, fruit, herb and then put them in the case by different plant. It helps me to keep everything organized and for quick reference. The CD case will not shut completely (fyi) I am looking for a new case that is in a larger folder, I tend to have too many seeds! 

This project is great for kids to help on a rainy day. It doesn't take much time to complete and the result is you just lay them in the bed instead of having to space out and waste valuable 'gardening' time. 

For this I choose to do the sunflower since the seeds are so large, it's easy to see online. I flipped over and saw the spacing requirements are three inches.

I roll out about five sheets of paper towels, then I re-roll them up and cut them into strips.

The website that I saw this on had elmers glue. I didn't like that at all. It's like the kid in class eating glue. I couldn't get that picture out of my head so I went on a gardening forum and asked suggestions. I received this 'idea' from Sonya Reasor. (Thank you) 
She suggested that I use flour and water to make a paste. 
I spaced them approximately three inches apart using a ruler. You can see the water being absorbed by the paper towels.

I let the mixture dry on the paper towel for several hours. You will know it is dry when you do not see the water around each seed. 

I carefully roll up each strip.

I place each strip that I made in a ziploc bag and place the empty seed packet in the pouch to for easy identification.

I also put a second seed packet, on the back, with the information for quick reference. 

When I am ready to plant I just unroll and place in the ground, at the appropriate depth, and I will have straight rows of sunflowers. You can use this for your herb, vegetable, or flower garden. The paper and flour mixture will eventually break down, leaving the seeds behind. I will post pictures as soon as my rows of sunflowers come up!